[Combine] Handling Errors - Operator 공부 12
안녕하세요 Pingu입니다.🐧
지난 글에서는 Combine의 Republishing Elements by Subscribing to New Publishers로 분류된 FlatMap, SwitchToLatest에 대해 알아봤습니다. 여러 개의 Publisher들 중 몇 개를 subscribe 할지 혹은 가장 최근에 subscribe 한 Publisher의 값만 Downstream으로 전달하는 역할을 했었습니다.
이번 글에서는 Handling Errors로 분류된 Publisher와 Operator에 대해 알아보도록 하겠습니다.
Handling Errors
분류된 이름에서 느낄 수 있듯 에러를 처리하는 Publisher와 Operator들을 알아보겠습니다.
Handling Errors에 분류된 Publisher들은 아래와 같습니다.
- AssertNoFailure
- Catch
- TryCatch
- Retry
그리고 이를 활용해서 만든 Operator는 아래와 같습니다.
- assertNoFailure(_:file:line:)
- catch(_:)
- tryCatch(_:)
- retry(_:)
그럼 바로 하나씩 자세히 알아보도록 하겠습니다.
AssertNoFailure

가장 먼저 알아볼 Publisher는 AssertNoFailure 입니다. 정의를 보면 failure event를 받으면 fatal error를 downstream에 전달하는 Publisher라고 되어있네요. 그 외의 경우엔 모두 Downstream으로 전달한다고 합니다.
즉 Upstream이 절대로 실패하면 안되는 타입이어야만 문제없이 동작하도록 하는 Publisher입니다.
assertNoFailure(_:file:line:)

AssertNoFailure Publisher를 활용해서 만든 Operator는 assertNoFailure(_:file:line:) 입니다.
정의를 보면 Upstream Publisher에서 failure를 받으면 fatal error를 발생시키는 역할을 한다고 합니다.
그리고 Failure를 제외한 값은 모두 Downstream으로 전달합니다.
간단하게 한 번 사용해볼게요.
struct PinguError: Error { }

let intPublisher = PassthroughSubject<Int, PinguError>()

intPublisher
    .assertNoFailure()
    .sink(receiveCompletion: { print($0) },
          receiveValue: { print($0) })

intPublisher.send(1)
intPublisher.send(2)
intPublisher.send(completion: .failure(PinguError())) // fatal Error 발생

// assertNoFailure(_:file:line:) 예제 코드
1
2
위와 같이 간단히 사용해볼 수 있습니다. 위 코드를 실제로 실행해보면 에러를 내보내기 전까지는 정상적으로 값이 Downstream에 전달되고 있지만 failure를 내려보내면 fatal error가 발생하는 것을 볼 수 있을 거예요.
이러한 특징 때문에 실제 서비스에서 사용하는 것은 위험할 수 있지만, 개발할 때나 테스트할 때는 유용하게 사용할 수 있을 거 같네요.
Catch

다음으로 알아볼 것은 Catch입니다.
정의를 보면 실패한 Publisher를 다른 Publisher로 바꿔서 Upstream에서 에러가 발생하더라고 처리할 수 있는 Publisher라고 하네요.
catch(_:)

Catch Publisher를 활용해서 만든 Operator는 catch(_:)입니다.
정의를 보면 Upstream의 Publisher에서 에러가 발생하면 다른 Publisher로 교체해서 처리하는 역할을 한다고 합니다.
간단하게 한 번 사용해볼게요.
struct PinguError: Error { }

let intPublisher = [4, 6, 5, 12, 7, 9, 10].publisher

intPublisher
    .tryMap { value in
        guard value % 2 == 0 else { throw PinguError() }
        return value * 2
    }
    .catch { error in
        Just(-1)
    }
    .sink(receiveCompletion: { print($0) },
          receiveValue: { print($0) })

// catch(_:) 예제 코드
8
12
-1
finished
위 코드는 보면 짝수는 두 배로 내려보내고 홀수는 PinguError를 던지는 코드입니다.
그래서 4, 6까지는 두배로 출력되지만 5에서 PinguError를 던지게 되어 catch로 처리되는데, catch에서는 에러가 발생하면 Just(-1)로 Publisher를 바꿔버립니다.
그래서 -1이 내보내지고 끝나게 됩니다.
간단하죠?
TryCatch

이번엔 TryCatch를 알아보겠습니다.
보통 Try는 기존 거에 에러를 던질 수 있다는 차이밖에 없었는데요, 이번에도 동일합니다.
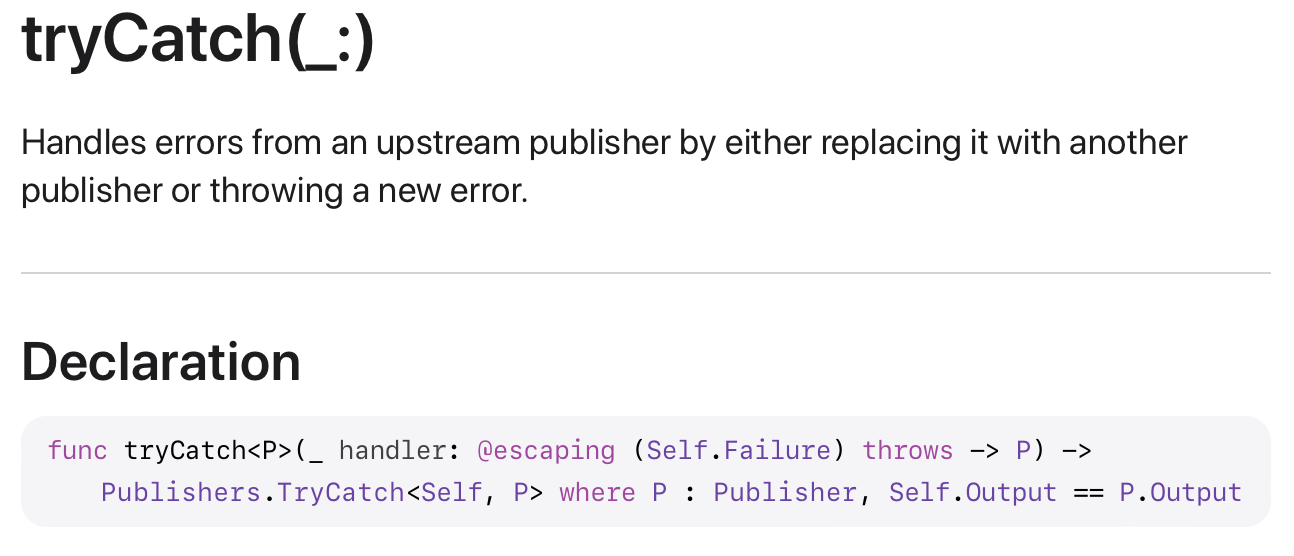
아까 Catch는 에러를 받으면 다른 Publisher로 바꾸기만 했다면 TryCatch는 다른 Publisher로 바꾸거나 다른 에러를 던질 수 있습니다.
tryCatch(_:)

TryCatch Publisher를 활용해서 만든 Operator는 tryCatch(_:)이고 catch(_:)와는 에러를 던질 수 있다는 차이점만 존재하니 바로 사용해보고 넘어가겠습니다.
이번에는 에러가 발생하면 다른 Publisher로 바꾸는 예제를 만들어볼게요.
struct PinguError: Error { }

let intPublisher = [4, 6, 7].publisher
let anotherPublisher = [10, 11].publisher

intPublisher
    .tryMap { value in
        guard value % 2 == 0 else { throw PinguError() }
        return value * 2
    }
    .tryCatch({ error -> AnyPublisher<Int, Never> in
        return anotherPublisher.eraseToAnyPublisher()
    })
    .sink(receiveCompletion: { print($0) },
          receiveValue: { print($0) })

// tryCatch(_:) 예제 코드
8
12
10
11
finished
이렇게 작성하면 tryMap에서 에러가 발생했을 때 tryCatch에서 다른 Publisher로 교체하는 결과를 볼 수 있습니다.
그럼 이번에는 tryCatch에 에러가 전달되면 다른 에러를 던지도록 해볼게요.
struct PinguError: Error { }
struct AnotherError: Error { }
let intPublisher = [4, 6, 7].publisher
let anotherPublisher = [10, 11].publisher
intPublisher
    .tryMap { value in
        guard value % 2 == 0 else { throw PinguError() }
        return value * 2
    }
    .tryCatch({ error -> AnyPublisher<Int, Never> in
        if error is PinguError { throw AnotherError() }
        return anotherPublisher.eraseToAnyPublisher()
    })
    .sink(receiveCompletion: { print($0) },
          receiveValue: { print($0) })

// tryCatch(_:) 예제 코드
8
12
failure(__lldb_expr_56.(unknown context at $10855f15c).(unknown context at $10855f1f4).(unknown context at $10855f220).AnotherError())
위 코드는 tryCatch에 전달된 에러가 PinguError라면 AnotherError로 바꿔서 던지는 코드입니다.
크게 어려운 점은 없는 듯합니다!
Retry

마지막으로 알아볼 Publisher는 Retry입니다.
정의를 보면 Upstream Publisher가 실패한다고 해도 새로운 subscription을 만들어서 다시 시도하는 Publisher라고 하네요.
네트워크 에러와 같은 상황이 발생할 때 몇 번 더 시도하고 에러를 발생시키도록 하는 등의 다양한 활용 방법이 있을 거 같은 Publisher인 거 같습니다.
retry(_:)

Retry Publisher를 활용해서 만들어진 Operator는 retry(_:)입니다.
정의를 보면 upstream Publisher가 실패하더라도 매개변수로 주어진 횟수만큼 재시도하는 역할을 한다고 합니다.
아주 직관적이네요.
바로 사용해볼게요.
struct PinguError: Error { }

var retryCount: Int = 0

func retryTest() throws {
    if retryCount < 2 {
        retryCount += 1
        print("\(retryCount) 번째 재시도")
        throw PinguError()
    }
}

let intPublisher = [1, 2, 3, 4].publisher

intPublisher
    .tryMap({ value -> Int in
        try retryTest()
        return value
    })
    .retry(3)
    .sink(receiveCompletion: { print($0) },
          receiveValue: { print("receive: \($0)") })

// retry(_:) 예제 코드
1 번째 재시도
2 번째 재시도
receive: 1
receive: 2
receive: 3
receive: 4
finished
위 코드는 3번까지는 실패해도 다시 시도하도록 retry(_:)을 사용하여 Publisher를 subscribe 한 코드입니다.
retryCount라는 변수를 만들어서 재시도할 때마다 1씩 증가시키는 것도 볼 수 있어요.
그래서 결국 3번째 재시도는 성공해서 값을 받아오게 됩니다.
그럼 만약에 시도하는 횟수보다 실패하는 횟수가 많으면 어떻게 될까요?
struct PinguError: Error { }

var retryCount: Int = 0

func retryTest() throws {
    if retryCount < 4 {
        retryCount += 1
        print("\(retryCount) 번째 재시도")
        throw PinguError()
    }
}

let intPublisher = [1, 2, 3, 4].publisher

intPublisher
    .tryMap({ value -> Int in
        try retryTest()
        return value
    })
    .retry(3)
    .sink(receiveCompletion: { print($0) },
          receiveValue: { print("receive: \($0)") })

// retry(_:) 예제 코드
1 번째 재시도
2 번째 재시도
3 번째 재시도
4 번째 재시도
failure(__lldb_expr_80.(unknown context at $107dd019c).(unknown context at $107dd0294).(unknown context at $107dd029c).PinguError())
위와 같이 시도하는 횟수보다 실패하는 횟수가 많다면 에러가 그대로 전달되어 failure로 끝나게 됩니다.
이렇게 Combine의 Publisher와 Operator 중에서 Handling Errors로 분류된 것들에 대해 알아봤습니다. 실제로 앱을 만들 때 아주 유용할 거 같다는 생각이 많이 드네요.
다음 글에서는 시간과 관련된 Controlling Timing으로 분류된 것들에 대해 알아보도록 하겠습니다.
이번 글의 전체 코드는 여기에서 볼 수 있습니다.
감사합니다.